Friday, August 29, 2014

More Patty Pan Squash & Chocolate Bread

My squash plants just keep on producing and I am busily trying to play catch up! I am continuing on with the series of recipes on how to use up all of that SQUASH!

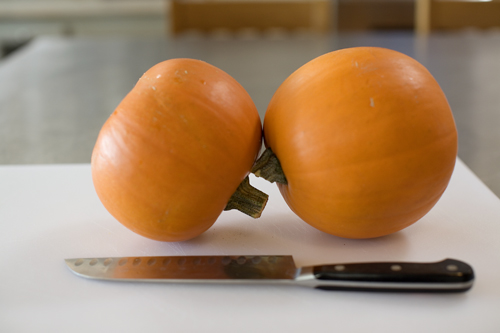
I dont know about you but I am ashamed to say that I am SQUASHED OUT here. I just can not eat another sautéed, pan fried, bbq'd, steamed, or broiled squash. I need to get creative.

Today the kids and I made Chocolate with Chocolate Chips Patty Pan Squash Bread from The Harmonious Kitchen. I love how simple and yummy her recipe is.


So the question is how do you turn this plain, white, kind of lumpy looking thing into this! 


Chocolate Pattypan Bread
Note: do not use summer squash other than pattypan for this recipe. Pattypan is significantly less wet than other squash, and a substitution will drastically change your results.
2 C (325 g) grated squash
1 C (770 g) oil
3 eggs (165 g)
3/4 C (159 g) white sugar
1/2 C (105 g) brown sugar
1 1/2 C (245 g) flour
1/2 C (51 g) cocoa
1/4 C (65 g) sour cream
2 T (12 g) baking powder
1 C (155 g) chocolate chips
Preheat oven to 350.  Grease and flour a 9×5 loaf pan. Mix oil, eggs, and both sugars until well incorporated.  Blend in flour, cocoa powder, sour cream, and baking powder. Stir in squash and chips.
Bake for 60 – 70 minutes.
NB: I feel absolutely certain that you could make this into a cake too. Just grease and flour two 9″ cake rounds, divide the batter, and bake 25 – 30 minutes.
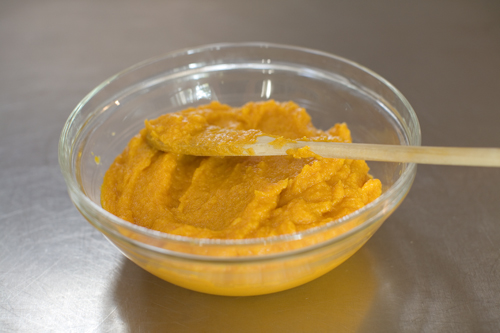
End Results!
The kids love this bread. They like to eat it with cream cheese on top. Its kind of like an icing when you put it on warm bread. They feel like they are getting dessert and I am happily feeding them squash and whole wheat. WIN WIN!
Side Note: I doubled the recipe and am using the other loaf as a base for a french toast bake. I chopped up the loaf (yes, after all that hard work) added half a loaf of  chopped plain whole wheat bread, four eggs, and 1 cup whole milk. I let it soak for a few hours in the fridge, covered it with tinfoil, and baked it for 1 hour at 350. I will be bringing this to a friend as a thank you for watching my kids while I work. See, you help me, I spoil you with baked goods!  

Thursday, August 14, 2014

Squash, squash, and more squash!!

What's a mom to do when her squash garden goes crazy and the kids dispise the taste of it? GET CREATIVE!!!

This post will explore squash recipes both old and new. Some from the interwebs, some will be my own. I will be posting at least one of these a day, complete with pictures and our reviews. Including what I actually got angle baby and monkey man to eat!

How about curry roasted squash soup, roasted squash soup with pesto, tomato basil & squash soup, squash chili, stuffed squash, eggs and squash, squash lasagna, squash fritters, chocolate squash bread, and squash cake.


The first is roasted squash soup with pesto courtesy of the awesome blog "Chocolate & Zucchini!

This is an old stand by and I love it! The kids even love it! It freezes very well and its super easy. I multiple this recipe by about 5 and I am not precise on amounts. Thats the best part about this recipe, its easy to adapt and make it your own.

Overall we all rate this as a 5/5 (even the kiddos)
That is what I call a winning recipe


For the soup:
- 2 shallots (I used walla walla onion)
- 1 pattypan squash, about 23 cm (9″) in diameter
- 1 liter (1 quart) chicken or vegetable stock, homemade if you have it
salt, pepper
olive oil
For the pesto*:
- 50 grams (about 2 1/2 cups) basil leaves
- 50 grams (1 3/4 ounces) ricotta salata (or parmesan, or pecorino)
- 25 grams (3/4 ounce) pine nuts, toasted
salt, pepper
olive oil
Serves 4 to 6.
Peel and mince the shallots. Remove the stem end and bottom button of the pattypan squash (no need to peel it). Quarter it, and cut it in chunks then slices. Put the stock in a saucepan and bring to a simmer.
In a medium pot, heat a drizzle of olive oil. Add the shallots and a sprinkle of salt, and cook over medium heat for 3-4 minutes, until softened, stirring regularly to avoid coloring.
Add the pattypan squash, sprinkle with salt, and sauté for about 5 minutes. Add the simmering stock, plus any boiling water necessary to completely cover the vegetables. Bring to a simmer, cover, and cook for 10 minutes, or until the squash is very soft.
While the soup is simmering, prepare the pesto. In a blender or food processor (you can also work by hand in a mortar if you prefer), combine the basil, cheese and pine nuts. Add a good pinch of salt, some pepper, and a generous drizzle of olive oil, and pulse until smooth. Add more olive oil if necessary for the pesto to come together.
Remove the soup from the heat, put on an apron, and whizz the soup with a stick blender (or in batches in a regular blender) until completely smooth.
Serve hot, but not too hot, sprinkled with freshly ground pepper, with pesto on the side for each diner to add a spoonful to his bowl.
* The recipe makes more pesto than you’ll need for this soup; I doubt that will be a problem.
Cooking/baking time: 20 min

Wednesday, August 13, 2014

New Businesses!!!

     First and for most I am SUPER EXCITED to share about my new business opportunities. I am now a presenter for Younique cosmetics. I LOVE IT! The women are amazing and it is a relatively new company. I feel completely supported by my team and we are all in it together. Not like other places I have worked for that make you feel like you are competing for customers. I am still pretty new, but have already paid for my own makeup and have started a savings for our up coming Disneyland trip! I have VERY sensitive skin, hence all of the homesteading, but no matter how I try and I can not get excited about my homemade mascara. It does not do anything but make them black and straight. It is horrible when it runs and I do not feel that "sexy back" feeling I look for when I actually take the time to put on makeup... hehe
    With the 3D fiber mascara lashes I FEEL SEXY! I feel flirty, fun, and ready to conquer the world. I know it sounds like a lot for a little tube of black stuff to do, but I promise you it does that and more!


I am finally back!

After yet another long hiatus, I am back in the blogging world with more umph then ever before! I have had a lot of changes around home, like the addition of two part-time jobs, home business, and renting out our room on AirBNB.  I have found that between that, homeschooling, and my own school; there has been very little time for blogging. Well, not anymore.....I AM BACK!

Thursday, October 17, 2013

Happy Fall Return & Pumpkin Puree

    After a very long hiatus, I am back in the blogging world. The blog looks a little different with an added mission. This has been a very long 6 months of so, with a lot of changes around the house as well. We have converted to as homemade or close to ground to table as possible when it comes to eating. This means the days are a little slower and the food takes more effort. I use the term "Urban Homesteading" kind of as a catch all for the changes around our home. I try to use homemade, local-made, or go without when possible. 
    Things this does not include are: clothes, cars, computers (obviously), every toy, and I am sure a few I am forgetting. We do not live on a farm and are not pretending to be completely Eco-perfectly-friendly or completely self sufficient. This is a slow process and somethings we will just not give up or have the space/money to handle on our own.

   In other big changes, I no longer nanny full-time but instead work for an amazing family two early mornings a week. This allows for a much easier flow of homeschooling, housework, ect. I LOVE my new just even with the hours of 5am-930am.  I am NOT a morning person but I am finding a new found appreciation for the quiet dawn I am now part of two days a week. 
    Long story short, new direction overall for blog, hopefully lots of new posts soon, & fun fall activities to share!


ROASTED PUMPKIN PUREE

    Today's activities include roasted pumpkin puree with pumpkins from a local farm. I use pumpkin all fall and winter long just like the rest of the pacific northwest. I love trying new ways to utilize it and having it be as fresh as possible is always preferable to me. I don't how ever love taking the time every time I was some to cut, de-seed, roast, puree, and then use the pumpkin. So to stream line this process I spend about one afternoon a month roasting and pureeing around 6-10 sugar pumpkins. I know you can use the bigger and less expensive pumpkins but the small sugar ones definitely taste more like the "traditional processed" pumpkin we are all used to. I can not take credit for this idea though, one of my favorite blogs, The Pioneer Woman, is where I got the idea. I love her easy to follow and well put together recipes. The pictures below are The Pioneer Woman's from her post on how to take this.......
and turn it into this......


Tuesday, April 3, 2012

HOMEMADE SNACK DAY!!

We took this afternoon to make a BUNCH of snack foods and a messy kitchen! :)

We made kale chips with sesame, garlic, and ginger and JJ loves them! He called them green crackers and has been munching on them all afternoon. I just coated the kale in the sesame oil and ginger, garlic, a little salt, and pepper and baked on low at 350 until crispy.

We also made some cookie dough to freeze and have when we want a special treat. We made oatmeal chocolate chip. But I added wheat grem, flax seed, and a little nutritional yeast. (these double as a milk cookie for me, which helps with my milk supply for evee)

Homemade nutella from this blog! I love the recipe and don't feel as bad when JJ wants it every am on his homemade wheat bread.

Roasted garlic hummus for myself and my mom.

Grahmn crackers! I love these and cant wait to make some homemade marshmallows another day.

Goldfish crackers! JJ loves these and so does Evee and they don't have any icky oils.

Chocolate peanut butter granola bars!

Fruit leather fruit roll ups!

I think we have some yummy healthy snacks now that I can feel good about both of my kids eating. 

make your own felt board & pieces!

I made the kids a felt board after going through my old toys and remembering how much fun it was as a kid to have a felt book. I looked around and really like this tutorial I found and went from there.

I made them one using an old picture frame and some black felt. It was what I had and I wanted it to literally be a blank canvas for them. I love it and it hangs in my kids playroom where my awesome brother attached it to the wall for me. I know this isn't ideal for all but kids will love any kind of felt board big or small. It is such an open ended activity and lends itself to adding new things all the time.

I just glued black felt to the "wood" back already part of the frame and took out the glass. Put it all back together and had my brother mount it with some very heavy duty brackets for me.

I am left handed and I don't know if its because of that or just lack of skill but I am not good at cutting things out. So with that in mind I decided to use some non fusible interfacing and trace my kids some letters and stories. The first three stories we have made are five little monkeys, three little pigs, and five little ducks.

 I looked all over using google images and found pictures I liked printed them out and trace using a black fabric marker.
 I then colored the pictures with colored pencils. It actually works and the kids love them!